●想定
以前、実施しました「●VMware ESXi 6.7上でCentOS 7 + Pacemaker + Corosyncの設定に挑戦」の更新版となります。
Zabbixで使用するデータベースMariaDBのデータは共有ディスク上に保存します。
Pacemakerで仮想IP、共有ディスク(DRBDリソース)、MariaDB、Apache(php-fpm含む)、Zabbixを制御します。
今回は、VMware ESXi 7.x上でRocky 9 + Pacemaker + Corosyncを構成する形なります。
VMWare上での共有ディスクの作成は「ノードの準備」~「パーティションの設定」を参照してください。
DRBDを用いた共有ディスクの作成は「DRBDの構築について」の「●DRBDのインストール」~「●DRBDの停止」を参照して下さい。
作成した共有ディスクにMariaDBのデータベースを保存するように設定します。
この作業は、DRBDデバイスをマウントした側のホストでのみの作業となります。
MariaDBの設定は「●初期設定(CentOS 8)」、「●MariaDB(MySQL)のデータベースのフォルダを変更するには」を参照してください。
一方のホストからMariaDBへのアクセス等が確認できたら、必ず他方のホストでもMariaDBへのアクセス等が問題なくできることを確認します。
●インストール前の準備
こちらは、MariaDBをまだインストールしていない場合の作業となります。
MariaDBのインストール
参考URL:Zabbix 5.4 インストールメモ(CentOS Stream 8)
ZABBIXの監視記録を保管するMariaDBサーバとMariaDB用開発パッケージをインストールします。
rootユーザでログインして次のコマンドを実行します。
(Rocky 9の場合)
# dnf install -y mariadb-server mariadb-devel
# mysql_secure_installation

NOTE: RUNNING ALL PARTS OF THIS SCRIPT IS RECOMMENDED FOR ALL MariaDB
      SERVERS IN PRODUCTION USE!  PLEASE READ EACH STEP CAREFULLY!

In order to log into MariaDB to secure it, we'll need the current
password for the root user.  If you've just installed MariaDB, and
you haven't set the root password yet, the password will be blank,
so you should just press enter here.

Enter current password for root (enter for none):
OK, successfully used password, moving on...

Setting the root password ensures that nobody can log into the MariaDB
root user without the proper authorisation.

Set root password? [Y/n] Y
New password:
Re-enter new password:
Password updated successfully!
Reloading privilege tables..
 ... Success!


By default, a MariaDB installation has an anonymous user, allowing anyone
to log into MariaDB without having to have a user account created for
them.  This is intended only for testing, and to make the installation
go a bit smoother.  You should remove them before moving into a
production environment.

Remove anonymous users? [Y/n] Y
 ... Success!

Normally, root should only be allowed to connect from 'localhost'.  This
ensures that someone cannot guess at the root password from the network.

Disallow root login remotely? [Y/n] Y
 ... Success!

By default, MariaDB comes with a database named 'test' that anyone can
access.  This is also intended only for testing, and should be removed
before moving into a production environment.

Remove test database and access to it? [Y/n] Y
 - Dropping test database...
 ... Success!
 - Removing privileges on test database...
 ... Success!

Reloading the privilege tables will ensure that all changes made so far
will take effect immediately.

Reload privilege tables now? [Y/n] Y
 ... Success!

Cleaning up...

All done!  If you've completed all of the above steps, your MariaDB
installation should now be secure.

Thanks for using MariaDB!
MySQLデータベースサーバの設定ファイルを以下のように修正します。
(Rocky 9の場合)
# vi /etc/my.cnf.d/mariadb-server.cnf
[mysqld]
datadir=/var/lib/mysql
socket=/var/lib/mysql/mysql.sock
log-error=/var/log/mariadb/mariadb.log
pid-file=/run/mariadb/mariadb.pid

# systemctl start mariadb

後ほどクラスタ構成とするため、下記は実施しません。
# systemctl enable --now mariadb
●Zabbix 7.0のインストール
Zabbix 7.0をインストールします。
Zabbixインストール時にEPELリポジトリが利用可能の場合、競合しますので無効化します。
# dnf config-manager --disable epel

# dnf install https://repo.zabbix.com/zabbix/7.0/rocky/9/x86_64/zabbix-release-latest.el9.noarch.rpm
# dnf install zabbix-server-mysql zabbix-web-service zabbix-sql-scripts zabbix-agent2 zabbix-web-mysql zabbix-apache-conf zabbix-web-japanese zabbix-get
必要に応じて、TIMEZONEを編集します。
# vi /etc/php-fpm.d/zabbix.conf
php_value[date.timezone] = "Asia/Tokyo"

※Apache及びphp-fpmの設定は完了しているものとします。
# systemctl restart php-fpm
●Zabbix 7.0のデータベース設定
MariaDBにログインし、Zabbix用のデータベース「zabbix」と、ユーザ「zabbix」を作成します。
# mysql -uroot -p
Enter password:
MariaDB [(none)]> create database zabbix character set utf8 collate utf8_bin;
MariaDB [(none)]> create user zabbix@localhost identified by 'password';
MariaDB [(none)]> grant all privileges on zabbix.* to zabbix@localhost;
MariaDB [(none)]> flush privileges;
MariaDB [(none)]> quit
Zabbix用のデータベーススキーマとデータをインポートします(少し時間がかかります)。
# zcat /usr/share/doc/zabbix-sql-scripts/mysql/create.sql.gz | mysql -uzabbix zabbix -p
Enter password:  ← 上記で設定したパスワードを入力
zabbix-serverの設定ファイルを編集します。
# vi /etc/zabbix/zabbix_server.conf DBHost=localhost DBName=zabbix DBUser=zabbix DBSocket=/mnt/var/lib/mysql/mysql.sock DBPassword=yourpassword # systemctl enable --now zabbix-serverApache及びPHPをインストールしていない場合、インストールします。
php-fpm、Apacheをインストール済みの場合
# systemctl restart php-fpm httpd

後ほどクラスタ構成とするため、下記は実施しません。
# systemctl enable --now httpd
# systemctl enable --now php-fpm
ApacheとPHPのインストール
ApacheとPHPをインストールしていない場合の作業です。
ZABBIXサーバのWebインターフェイスを利用できるようにするために、ApacheとPHPをインストールします。
# dnf install httpd php-fpm -y

必要に応じて、TIMEZONEを編集します。
# vi /etc/php-fpm.d/zabbix.conf
php_value[date.timezone] = "Asia/Tokyo"

# systemctl enable --now httpd php-fpm
PHPをソースからインストールしている場合、ZABBIX用に以下のようにconfigureオプションをつけます。
# ./configure --with-apxs2 --with-gd --with-bcmath --with-mysql --with-mbstring --with-sockets
●Zabbixエージェントの起動及び動作確認
Zabbixエージェントを起動してます。
# systemctl enable --now zabbix-agent2Zabbixエージェントが正常に動作しているか確認します(Zabbixのバージョンが表示されればOKです)。
$ zabbix_get -s 127.0.0.1 -k agent.version
7.0.3
リモートのZabbix Serverから監視される場合、下記のように設定します。
# vi /etc/zabbix/zabbix_agent2.conf
Hostname=hostA ← Zabbix Serverで監視ホストして登録した時のホスト名を指定
ListenIP=127.0.0.1,192.168.0.44 ← 192.168.0.44はzabbix_serverがインストールされているIPアドレス
Server=192.168.0.43,192.168.0.44 ← これを設定することにより、設定したIPアドレからzabbix_getコマンドを実行することができるようになる

Zabbix 7.0のagentでは「AllowRoot」が利用できなくなりました
AllowRoot=1 ← 設定できない

# systemctl restart zabbix-agent ← zabbix-agentの再起動
Zabbix 7.0のagentでは「AllowRoot」が利用できなくなりました。
AllowRoot=1 ← 設定できない
下記を参考にして、zabbix_agent2のユニットサービスを変更することとします。
参考URL:Zabbix Agent2をroot権限で起動できるようにする(AllowRoot代替)
変更前の内容は下記のとおりでした。
# cat /usr/lib/systemd/system/zabbix-agent2.service
[Unit]
Description=Zabbix Agent 2
After=syslog.target
After=network.target

[Service]
Environment="CONFFILE=/etc/zabbix/zabbix_agent2.conf"
EnvironmentFile=-/etc/sysconfig/zabbix-agent2
Type=simple
Restart=on-failure
PIDFile=/run/zabbix/zabbix_agent2.pid
KillMode=control-group
ExecStart=/usr/sbin/zabbix_agent2 -c $CONFFILE
ExecStop=/bin/kill -SIGTERM $MAINPID
RestartSec=10s
User=zabbix
Group=zabbix
LimitNOFILE=8192

[Install]
WantedBy=multi-user.target
これを下記のように変更します。
# cat /usr/lib/systemd/system/zabbix-agent2.service
[Unit]
Description=Zabbix Agent 2
After=syslog.target
After=network.target

[Service]
Environment="CONFFILE=/etc/zabbix/zabbix_agent2.conf"
EnvironmentFile=-/etc/sysconfig/zabbix-agent2
Type=simple
Restart=on-failure
PIDFile=/run/zabbix/zabbix_agent2.pid
KillMode=control-group
ExecStart=/usr/sbin/zabbix_agent2 -c $CONFFILE
ExecStop=/bin/kill -SIGTERM $MAINPID
RestartSec=10s
User=root
Group=root
LimitNOFILE=8192

[Install]
WantedBy=multi-user.target
設定を反映するために、daemon-reloadの後にプロセス再起動を行います。
# systemctl daemon-reload
# systemctl restart zabbix-agent2

# ps aux|grep zabbix_agent2
zabbix      3004  0.2  0.1 1841564 30092 ?       Ssl  14:22   0:03 /usr/sbin/zabbix_agent2 -c /etc/zabbix/zabbix_agent2.conf
 ↓
root        3216  0.2  0.1 1841564 26516 ?       Ssl  14:52   0:03 /usr/sbin/zabbix_agent2 -c /etc/zabbix/zabbix_agent2.conf
●Firewalldの設定
Firewallを導入済みの場合、下記のサービス(または、ポート)を開けるようにします。
- http(80/tcp)
- https(443/tcp)
- mariadb(3306/tcp)
- zabbix-agent(10050/tcp)
- zabbix-server(10051/tcp)
# firewall-cmd --add-service={http,https,mariadb,zabbix-agent,zabbix-server} --permanent
# firewall-cmd --reload
http://(ZabbixサーバのIPアドレス)/zabbix/ へアクセスし、Zabbixのセットアップを進めてください。
●Pacemaker制御前のphp-fpm、httpd、mariadb、zabbix-sesrverの起動方法
まず、Mariadbのデータが保存されている共有ディスクを2台のホストの一方でマウントします。
[root@rocky9-7 ~]# systemctl start drbd
[root@rocky9-8 ~]# systemctl start drbd

2台のホストで実施
[root@rocky9-7 ~]# drbdadm up r0
[root@rocky9-8 ~]# drbdadm up r0

一方のホストをプライマリで昇格
[root@rocky9-7 ~]# drbdadm primary r0

一方のホストがプライマリになっているか確認
[root@rocky9-7 ~]# drbdadm status r0
r0 role:Primary
  disk:UpToDate
  rocky9-8 role:Secondary
    peer-disk:UpToDate

他方のホストがセカンダリになっているか確認
[root@rocky9-7 ~]# drbdadm status r0
r0 role:Secondary
  disk:UpToDate
  rocky9-7 role:Primary
    peer-disk:UpToDate
DRBDがプライマリになっているホスト側でマウントします。
[root@rocky9-7 ~]# mount /dev/drbd0 /mntこの後、php-fpm等のサービスを起動します。
[root@rocky9-7 ~]# systemctl start php-fpm httpd mariadeb zabbix-server問題なく起動できれば、Web GUI(フロントエンド)に接続できます。
http://<ホスト名>.bigbang.mydns.jp/zabbix/
●Zabbix 7.0 フロントエンド画面での初期設定
参考URL:Zabbix 7.0をCentOS 8にインストール(MySQL編)
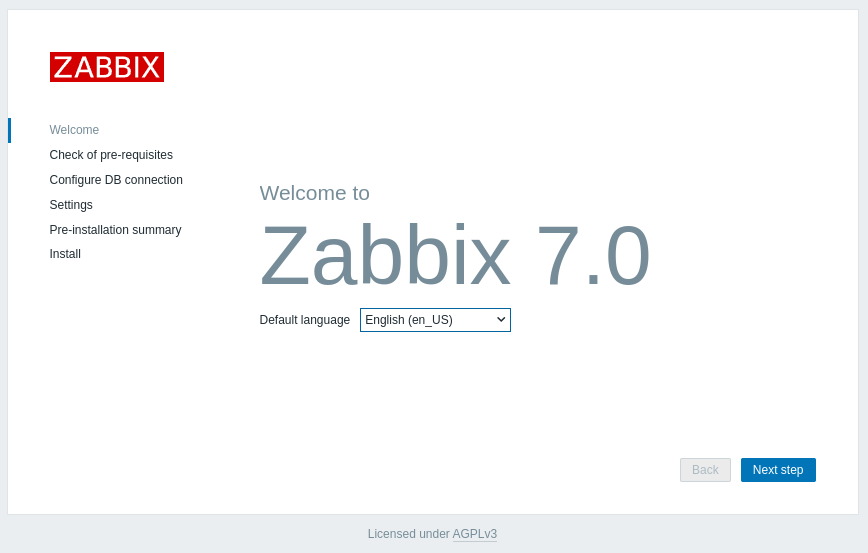
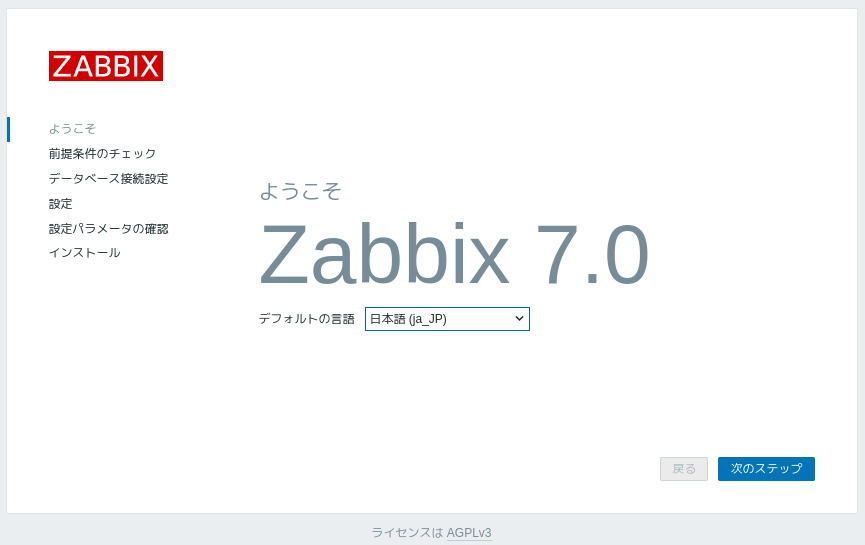
Default Languageで「日本語(ja_JP)」を選択し、Next stepを押下します。
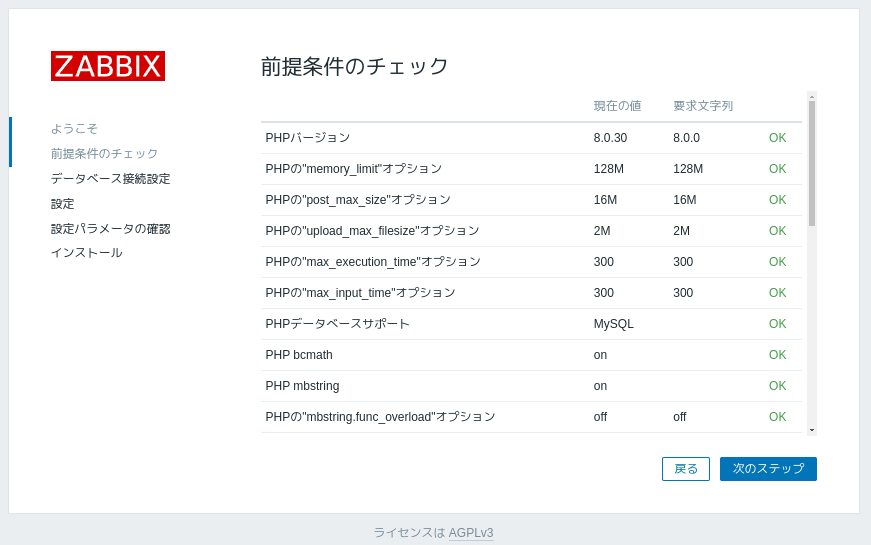
全ての項目が「OK」となっていることを確認してください。
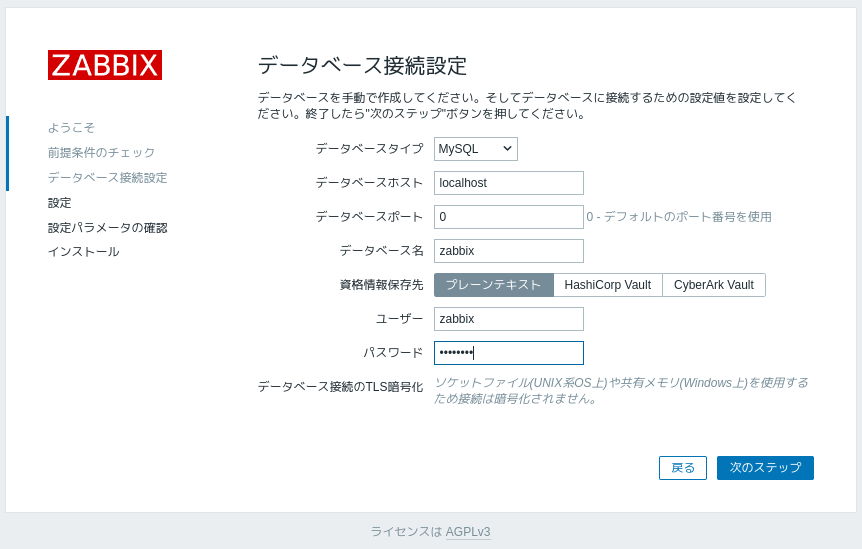
/etc/zabbix/zabbix_server.confで設定した値を入力します。
- DBHost=localhost
- DBName=zabbix
- DBUser=zabbix
- DBPassword="設定したパスワード"
データベースポートはデフォルトの「0」のままで問題ありません。
下記はそのままで設定しました。
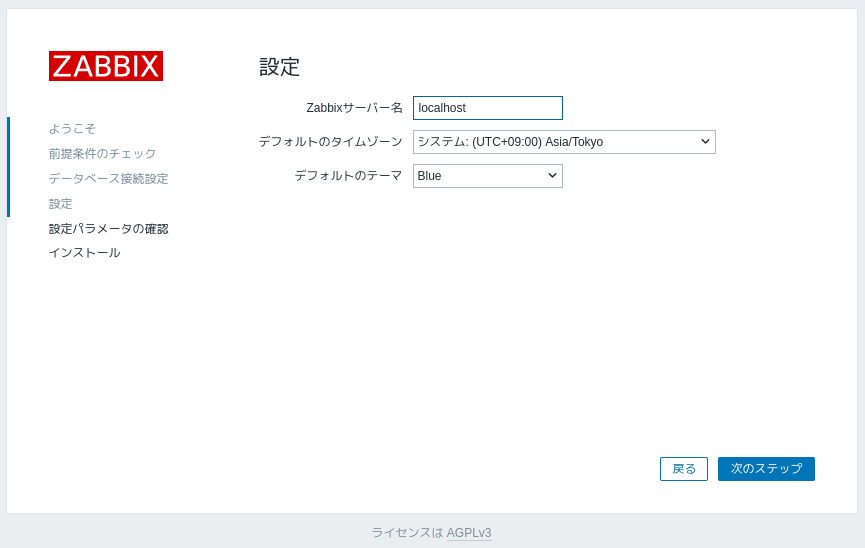
下記ウィンドウではデフォルトのまま次に進みます。
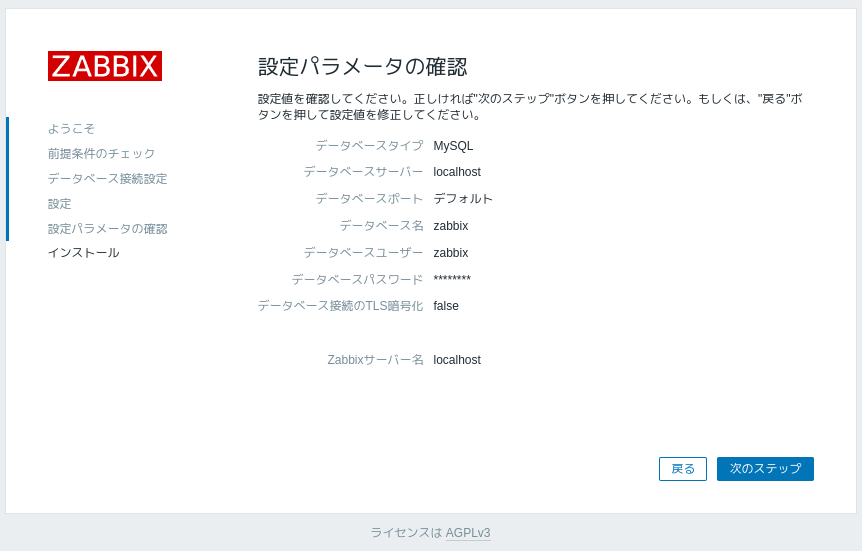
設定情報を確認し、問題なければ次に進みます。
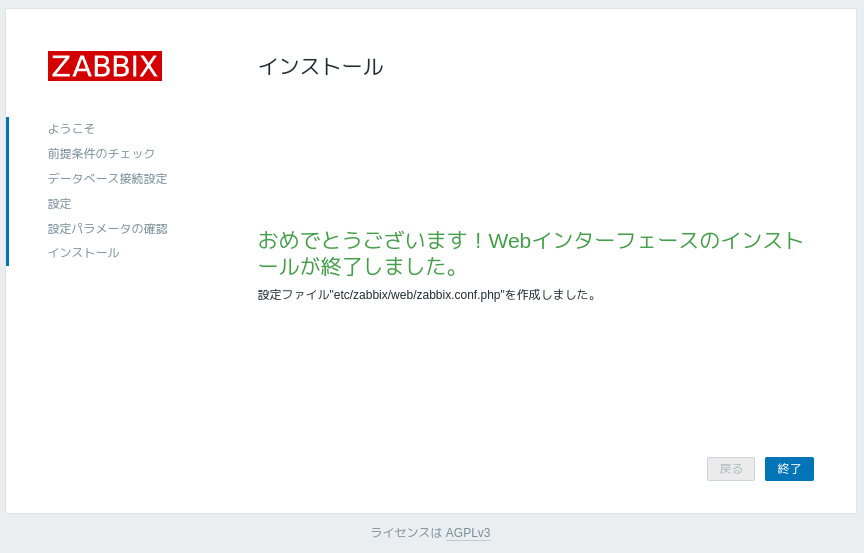
無事設定が完了しました。
デフォルトのユーザ名とパスワードは下記のとおりです。
- ユーザ名:Admin
- パスワード:zabbix

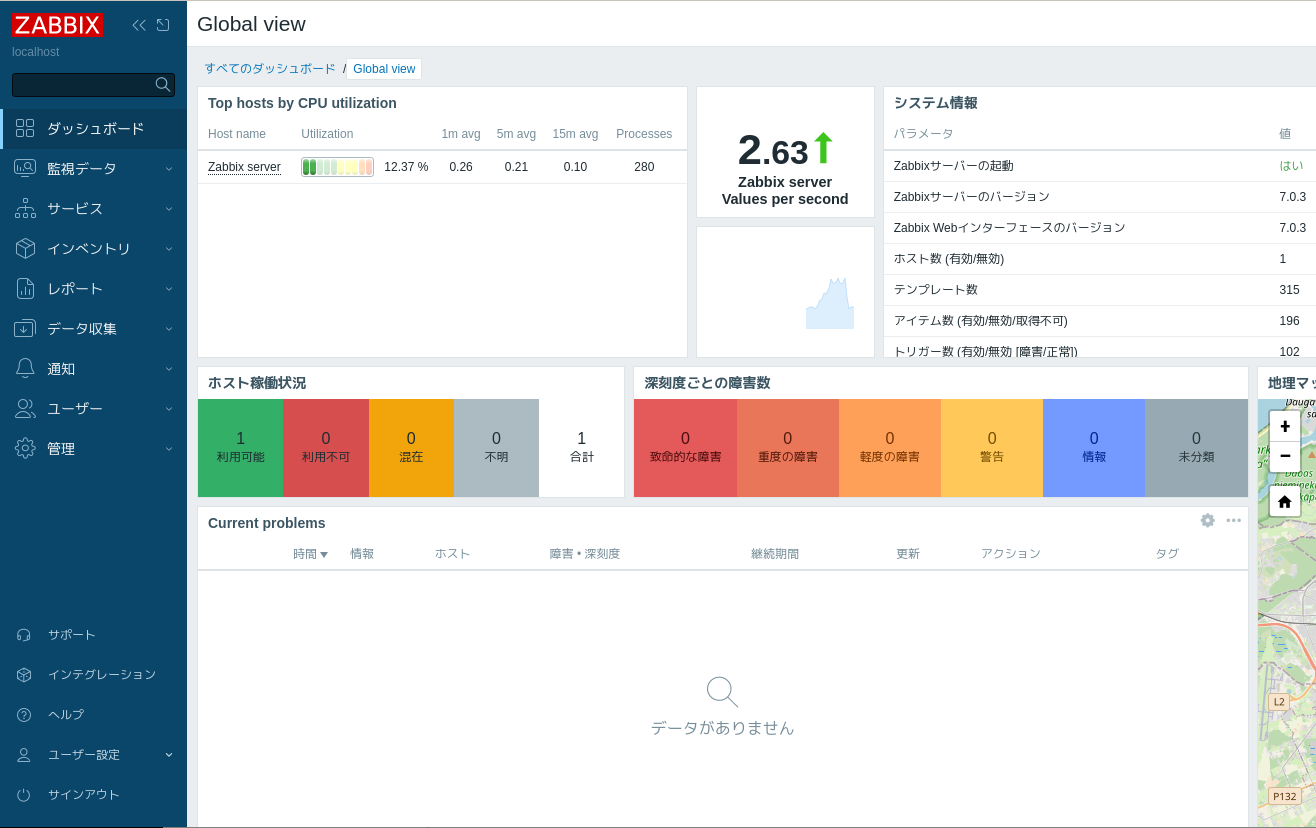
Web GUIでログインすると下記のように表示されます。
●zabbix_server.confの設定
設定した箇所を列挙します。
# vi /etc/zabbix/zabbix_server.conf
DBHost=localhost
DBName=zabbix
DBUser=zabbix
DBSocket=/mnt/var/lib/mysql/mysql.sock
DBPassword=yourpassword
CacheSize=64M
ValueCacheSize=128M
●zabbix_agent2.confの設定
設定した箇所を列挙します。
# vi /etc/zabbix/zabbix_agent2.conf
Hostname=hostA ← Zabbix Serverで監視ホストして登録した時のホスト名を指定
Server=127.0.0.1,192.168.0.40,192.168.0.43,192.168.0.44 ← 192.168.0.44はzabbix_serverがインストールされているIPアドレス
  ↑ これを設定することにより、設定したIPアドレからzabbix_getコマンドを実行することができるようになる
ServerActive=127.0.0.1,192.168.0.40,192.168.0.43,192.168.0.44 ← Active checksを許可するIPアドレス
●監視を始める
参考URL:Zabbixエージェントをインストール・対象サーバを監視してみました!
監視するホストを追加します。
左タブの「データ収集」-「ホスト」をクリックします。
右上の「ホストの作成」をクリックします。
「新しいホストの作成」ウィンドウが立ち上がりますので、「ホスト名」「テンプレート」「ホストグループ」「インターフェース」と設定します。
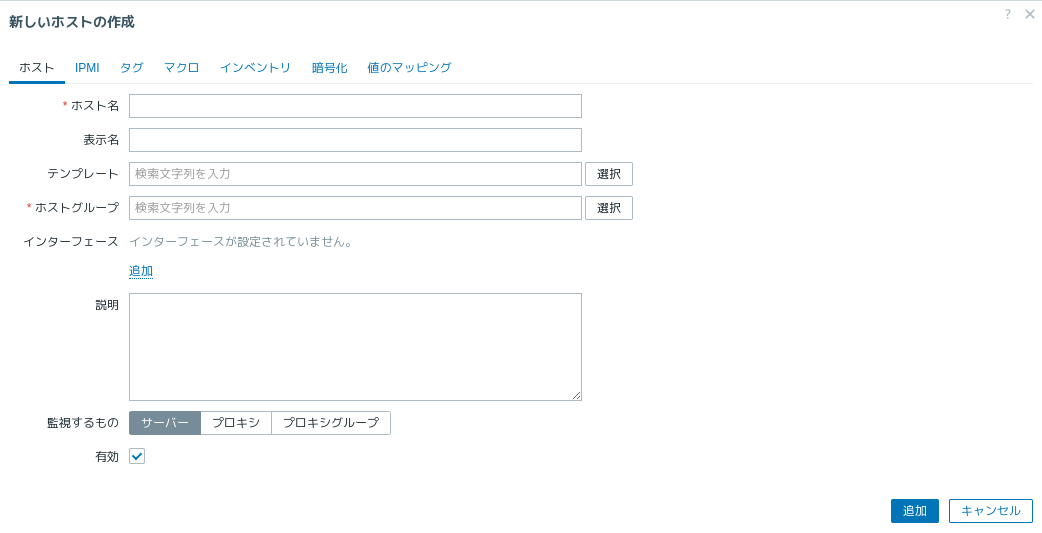
- ホスト名:監視対象のホスト名を入力
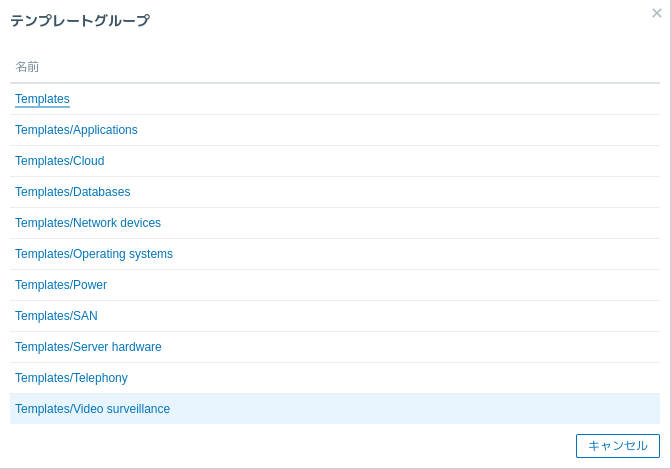
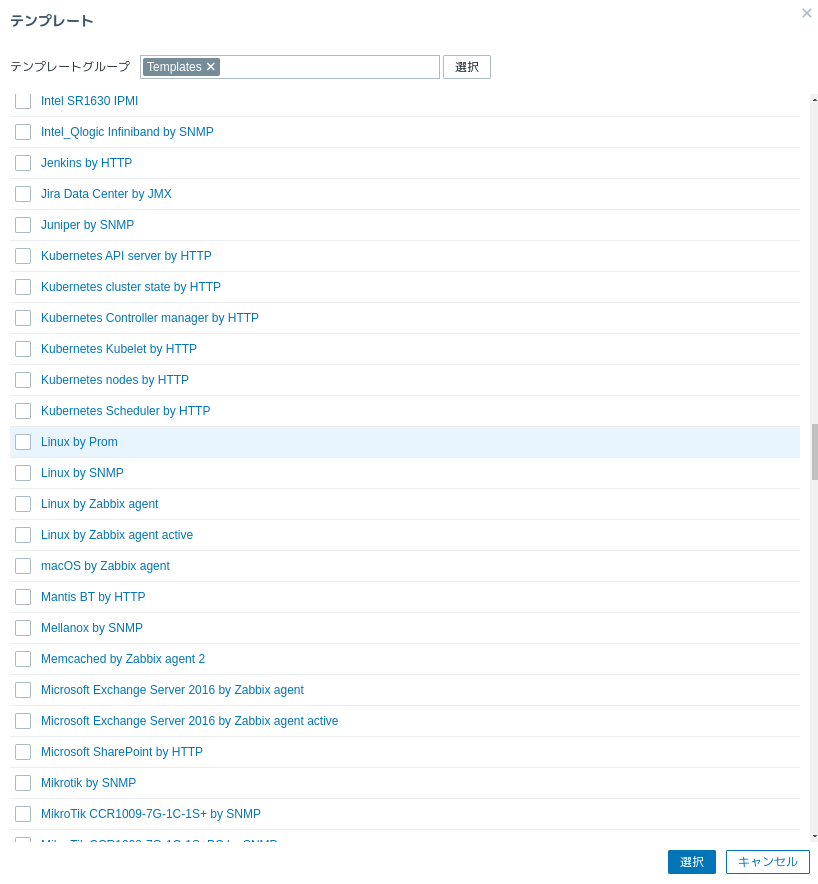
- テンプレート:テンプレートグループで「Templates」を選択後、「Linux by Zabbix agent」及び「OS processes by Zabbix agent」を選択
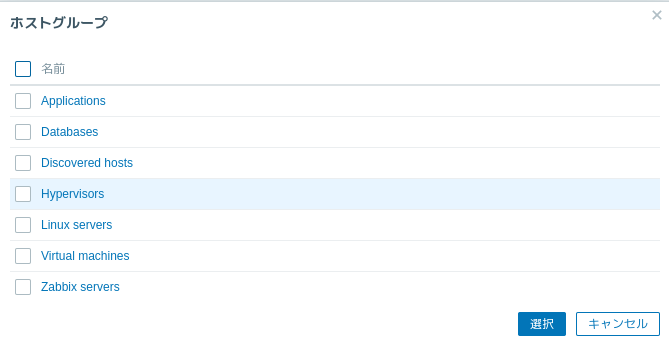
- ホストグループ:「Linux Servers」を選択
- インターフェース:「追加」をクリック。「エージェント」を選択、IPアドレスを入力。ポートはデフォルトの「10050」のまま

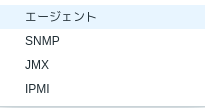

登録したホストの「エージェントの状態」の「ZBX」が緑色になっていれば監視できています(アイテム、トリガー、グラフ、ディスカバリの横に数字が表示されているはず)。
●Pacemakerの設定
pacemaker及びpcsをインストールします。
※両ノードで実施
# dnf --enablerepo=ha install -y pacemaker pcs fence-agents-all
/etc/hostsを設定します。
クラスタ用ユーザを設定する。dnfでインストールすると、「hacluster」ユーザが作成されているはずなので確認します。
※両ノードで実施
[root@rocky9-7 ~]# cat /etc/passwd | grep hacluster
hacluster:x:189:189:cluster user:/home/hacluster:/sbin/nologin

[root@rocky9-8 ~]# cat /etc/passwd | grep hacluster
hacluster:x:189:189:cluster user:/home/hacluster:/sbin/nologin
パスワードを設定します。両ノードで同一のパスワードです。
※両ノードで実施
# passwd hacluster
ユーザ hacluster のパスワードを変更。
新しいパスワード:
新しいパスワードを再入力してください:
passwd: すべての認証トークンが正しく更新できました。
# vi /etc/hosts
10.0.0.41    rocky9-7
10.0.0.42    rocky9-8
192.168.0.41    rocky9-7c
192.168.0.42    rocky9-8c
クラスタサービスを起動します。
# systemctl enable --now pcsd以上でインストール作業は完了です。
クラスタサービスを利用できるようファイアーウォールを設定します。
※両ノードで実施
# firewall-cmd --add-service=high-availability --permanent
success
# firewall-cmd --reload
success
クラスタの初期設定を実施します。
※一方のノードで実施
[root@rocky9-7 ~]# pcs host auth rocky9-7 rocky9-8
Username: hacluster
Password:
rocky9-8: Authorized
rocky9-7: Authorized
Pacemaker・Corosyncのクラスタを作成(Rocky 9)
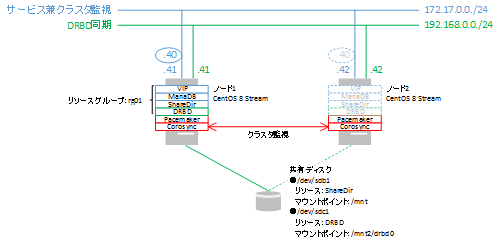
172.17.0/24側に仮想IPを設定するため、下記のように実行しました。
[root@rocky9-7 ~]# pcs cluster setup --start bigbang rocky9-7 addr=172.17.0.41 addr=192.168.0.41 rocky9-8 addr=172.17.0.42 addr=192.168.0.42クラスタの初期状態を確認します。Destroying cluster on hosts: 'rocky9-7', 'rocky9-8'... rocky9-7: Successfully destroyed cluster rocky9-8: Successfully destroyed cluster Requesting remove 'pcsd settings' from 'rocky9-7', 'rocky9-8' rocky9-7: successful removal of the file 'pcsd settings' rocky9-8: successful removal of the file 'pcsd settings' Sending 'corosync authkey', 'pacemaker authkey' to 'rocky9-7', 'rocky9-8' rocky9-7: successful distribution of the file 'corosync authkey' rocky9-7: successful distribution of the file 'pacemaker authkey' rocky9-8: successful distribution of the file 'corosync authkey' rocky9-8: successful distribution of the file 'pacemaker authkey' Sending 'corosync.conf' to 'rocky9-7', 'rocky9-8' rocky9-7: successful distribution of the file 'corosync.conf' rocky9-8: successful distribution of the file 'corosync.conf' Cluster has been successfully set up. Starting cluster on hosts: 'rocky9-7', 'rocky9-8'...
設定したホスト名でクラスタが2台ともオンラインとなっています。[root@rocky9-7 ~]# pcs status Cluster name: bigbang WARNINGS: No stonith devices and stonith-enabled is not false Cluster Summary: * Stack: corosync (Pacemaker is running) * Current DC: rocky9-8 (version 2.1.7-5.el9_4-0f7f88312) - partition with quorum * Last updated: Wed Aug 28 14:44:12 2024 on rocky9-7 * Last change: Wed Aug 28 14:44:01 2024 by hacluster via hacluster on rocky9-8 * 2 nodes configured * 0 resource instances configured Node List: * Online: [ rocky9-7 rocky9-8 ] Full List of Resources: * No resources Daemon Status: corosync: active/disabled pacemaker: active/disabled pcsd: active/enabled
クラスタの管理通信の確認は以下コマンドで実施します。2つのリンクが設定されていることがわかります。
[root@rocky9-7 ~]# corosync-cfgtool -s
Printing link status.
Local node ID 1
LINK ID 0
	addr	= 10.0.0.41
	status:
		nodeid  1:	localhost
		nodeid  2:	connected
LINK ID 1
	addr	= 192.168.0.41
	status:
		nodeid  1:	localhost
		nodeid  2:	connected
クラスタのプロパティを設定
参考URL:Pacemaker/Corosync の設定値について
-
no-quorum-policy: クラスタがquorumを持っていないときの動作を定義します。デフォルトはstop(全リソース停止)です。
2台構成の場合は、片方が停止しても動作を続行できるよう、ignore(全リソースはそのまま動作を続行)を指定します。 -
stonith-enabled: フェンシング(STONITH)を有効にするかどうかを指定します。デフォルトはtrue(有効)です。
これが有効、かつSTONITHリソースが未設定の場合リソースが起動できません。 -
cluster-recheck-interval: クラスタのチェック間隔を指定します。デフォルトは15分です。
failure-timeout(failcountを自動クリアするまでの時間)など、時間ベースの動作が反映されるまでの時間に影響します。
検証目的ですので、STONITHは無効化します。クラスタの設定として、STONITHの無効化を行い、no-quorum-policyをignoreに設定します。
本来、スプリットブレイン発生時の対策として、STONITHは有効化するべきです。
no-quorum-policyについて、通常クォーラムは多数決の原理でアクティブなノードを決定する仕組みですが、2台構成のクラスタの場合は多数決による決定ができません。
この場合、クォーラム設定は「ignore」に設定するのがセオリーのようです。
この時、スプリットブレインが発生したとしても、各ノードのリソースは特に何も制御されないという設定となるため、STONITHによって片方のノードを強制的に電源を落として対応することになります。
※両ノードで実行
# systemctl enable --now pcsd

[root@rocky9-7 ~]# pcs property
Cluster Properties: cib-bootstrap-options
  cluster-infrastructure=corosync
  cluster-name=bigbang
  dc-version=2.1.7-5.el9_4-0f7f88312
  have-watchdog=false
[root@rocky9-7 ~]# pcs property set stonith-enabled=false
[root@rocky9-7 ~]# pcs property set no-quorum-policy=ignore
[root@rocky9-7 ~]# pcs resource defaults failure-timeout=180s
Deprecation Warning: This command is deprecated and will be removed. Please use 'pcs resource defaults update' instead.
Warning: Defaults do not apply to resources which override them with their own defined values
※Warningは無視してください。
[root@rocky9-7 ~]# pcs resource defaults migration-threshold=3
Deprecation Warning: This command is deprecated and will be removed. Please use 'pcs resource defaults update' instead.
Warning: Defaults do not apply to resources which override them with their own defined values
※Warningは無視してください。

DRBDは自動フェールバックを無効としておかないとDRDBでフェンシングが発生し、2台ともStandAlone状態となってしまう場合があります。
そのため、自動フェールバックを無効とします(Warningは無視します)。
[root@rocky9-7 ~]# pcs resource defaults resource-stickiness=INFINITY
Deprecation Warning: This command is deprecated and will be removed. Please use 'pcs resource defaults update' instead.
Warning: Defaults do not apply to resources which override them with their own defined values
※Warningは無視してください。
[root@rocky9-7 ~]# pcs property
Cluster Properties: cib-bootstrap-options
  cluster-infrastructure=corosync
  cluster-name=bigbang
  dc-version=2.1.7-5.el9_4-0f7f88312
  have-watchdog=false
  no-quorum-policy=ignore
  stonith-enabled=false
クラスタのリソースを設定
リソースを設定します。
[root@rocky9-7 ~]# pcs resource create DRBD_r0 ocf:linbit:drbd drbd_resource=r0
[root@rocky9-7 ~]# pcs resource promotable DRBD_r0 master-max=1 master-node-max=1 clone-max=2 clone-node-max=1 notify=true
Deprecation Warning: configuring meta attributes without specifying the 'meta' keyword is deprecated and will be removed in a future release
[root@rocky9-7 ~]# pcs resource cleanup DRBD_r0
Cleaned up DRBD_r0:0 on rocky9-8
Cleaned up DRBD_r0:0 on rocky9-7
Cleaned up DRBD_r0:1 on rocky9-8
Cleaned up DRBD_r0:1 on rocky9-7
Waiting for 1 reply from the controller
... got reply (done)
[root@rocky9-7 ~]# pcs resource create FS_DRBD0 ocf:heartbeat:Filesystem device=/dev/drbd0 directory=/mnt fstype=xfs
[root@rocky9-7 ~]# pcs resource create MariaDB systemd:mariadb --group zabbix-group
Deprecation Warning: Using '--group' is deprecated and will be replaced with 'group' in a future release. Specify --future to switch to the future behavior.
[root@rocky9-7 ~]# pcs resource cleanup
Cleaned up all resources on all nodes
Waiting for 1 reply from the controller
... got reply (done)
[root@rocky9-7 ~]# pcs resource create VirtualIP ocf:heartbeat:IPaddr2 ip=172.17.0.40 cidr_netmask=24 nic=ens192 op monitor interval=30s --group zabbix-group
Deprecation Warning: Using '--group' is deprecated and will be replaced with 'group' in a future release. Specify --future to switch to the future behavior.
[root@rocky9-7 ~]# pcs resource create httpd systemd:httpd --group zabbix-group
Deprecation Warning: Using '--group' is deprecated and will be replaced with 'group' in a future release. Specify --future to switch to the future behavior.
[root@rocky9-7 ~]# pcs resource create php-fpm systemd:php-fpm --group zabbix-group
Deprecation Warning: Using '--group' is deprecated and will be replaced with 'group' in a future release. Specify --future to switch to the future behavior.
[root@rocky9-7 ~]# pcs resource create zabbix-server systemd:zabbix-server --group zabbix-group
Deprecation Warning: Using '--group' is deprecated and will be replaced with 'group' in a future release. Specify --future to switch to the future behavior.
起動制約設定
## DRBD_r0は優先的にrocky9-7がMasterとして起動するように設定
[root@rocky9-7 ~]# pcs constraint location DRBD_r0-clone prefers rocky9-7=100
## DRBD_r0がMaster側のノードでFS_DRBD0リソースを起動するように設定
[root@rocky9-7 ~]# pcs constraint order promote DRBD_r0-clone then start FS_DRBD0
Adding DRBD_r0-clone FS_DRBD0 (kind: Mandatory) (Options: first-action=promote then-action=start)
## FS_DRBD0はDRBD_r0のMasterと同じノードで起動(異常検知で必要)
[root@rocky9-7 ~]# pcs constraint colocation add promoted DRBD_r0-clone with FS_DRBD0 INFINITY
## MariaDBはDRBD_r0のMasterと同じノードで起動(異常検知で必要)
[root@rocky9-7 ~]# pcs constraint colocation add promoted DRBD_r0-clone with MariaDB INFINITY
## VirtualIPはDRBD_r0のMasterと同じノードで起動(異常検知で必要)
[root@rocky9-7 ~]# pcs constraint colocation add promoted DRBD_r0-clone with VirtualIP INFINITY
## httpdはDRBD_r0のMasterと同じノードで起動(異常検知で必要)
[root@rocky9-7 ~]# pcs constraint colocation add promoted DRBD_r0-clone with httpd INFINITY
## php-fpmはDRBD_r0のMasterと同じノードで起動(異常検知で必要)
[root@rocky9-7 ~]# pcs constraint colocation add promoted DRBD_r0-clone with php-fpm INFINITY
## zabbix-serverはDRBD_r0のMasterと同じノードで起動(異常検知で必要)
[root@rocky9-7 ~]# pcs constraint colocation add promoted DRBD_r0-clone with zabbix-server INFINITY
## FS_DRBD0が起動してからzabbix-groupを起動するように設定
[root@rocky9-7 ~]# pcs constraint order FS_DRBD0 then start zabbix-group
Adding FS_DRBD0 zabbix-group (kind: Mandatory) (Options: first-action=start then-action=start)

※「master」というコマンド使用時に警告が表示された
## DRBD_r0は優先的にrocky9-7がMasterとして起動するように設定
[root@rocky9-7 ~]# pcs constraint location DRBD_r0-clone prefers rocky9-7=100
## DRBD_r0がMaster側のノードでFS_DRBD0リソースを起動するように設定
[root@rocky9-7 ~]# pcs constraint order promote DRBD_r0-clone then start FS_DRBD0
Adding DRBD_r0-clone FS_DRBD0 (kind: Mandatory) (Options: first-action=promote then-action=start)
## FS_DRBD0はDRBD_r0のMasterと同じノードで起動(異常検知で必要)
[root@rocky9-7 ~]# pcs constraint colocation add master DRBD_r0-clone with FS_DRBD0 INFINITY
Deprecation Warning: Role value 'master' is deprecated and should not be used, use 'Promoted' instead
## MariaDBはDRBD_r0のMasterと同じノードで起動(異常検知で必要)
[root@rocky9-7 ~]# pcs constraint colocation add master DRBD_r0-clone with MariaDB INFINITY
Deprecation Warning: Role value 'master' is deprecated and should not be used, use 'Promoted' instead
## VirtualIPはDRBD_r0のMasterと同じノードで起動(異常検知で必要)
[root@rocky9-7 ~]# pcs constraint colocation add master DRBD_r0-clone with VirtualIP INFINITY
Deprecation Warning: Role value 'master' is deprecated and should not be used, use 'Promoted' instead
## httpdはDRBD_r0のMasterと同じノードで起動(異常検知で必要)
[root@rocky9-7 ~]# pcs constraint colocation add master DRBD_r0-clone with httpd INFINITY
Deprecation Warning: Role value 'master' is deprecated and should not be used, use 'Promoted' instead
## php-fpmはDRBD_r0のMasterと同じノードで起動(異常検知で必要)
[root@rocky9-7 ~]# pcs constraint colocation add master DRBD_r0-clone with php-fpm INFINITY
Deprecation Warning: Role value 'master' is deprecated and should not be used, use 'Promoted' instead
## zabbix-serverはDRBD_r0のMasterと同じノードで起動(異常検知で必要)
[root@rocky9-7 ~]# pcs constraint colocation add master DRBD_r0-clone with zabbix-server INFINITY
Deprecation Warning: Role value 'master' is deprecated and should not be used, use 'Promoted' instead
## FS_DRBD0が起動してからzabbix-groupを起動するように設定
[root@rocky9-7 ~]# pcs constraint order FS_DRBD0 then start zabbix-group
Adding FS_DRBD0 zabbix-group (kind: Mandatory) (Options: first-action=start then-action=start)
クラスタの状態を確認します。
[root@rocky9-7 ~]# pcs status
Cluster name: bigbang
Cluster Summary:
  * Stack: corosync (Pacemaker is running)
  * Current DC: rocky9-7 (version 2.1.7-5.el9_4-0f7f88312) - partition with quorum
  * Last updated: Wed Aug 28 16:53:41 2024 on rocky9-7
  * Last change:  Wed Aug 28 16:53:31 2024 by root via root on rocky9-7
  * 2 nodes configured
  * 8 resource instances configured

Node List:
  * Online: [ rocky9-7 rocky9-8 ]

Full List of Resources:
  * Clone Set: DRBD_r0-clone [DRBD_r0] (promotable):
    * Promoted: [ rocky9-7 ]
    * Unpromoted: [ rocky9-8 ]
  * FS_DRBD0	(ocf:heartbeat:Filesystem):	 Started rocky9-7
  * Resource Group: zabbix-group:
    * MariaDB	(systemd:mariadb):	 Started rocky9-7
    * VirtualIP	(ocf:heartbeat:IPaddr2):	 Started rocky9-7
    * httpd	(systemd:httpd):	 Started rocky9-7
    * php-fpm	(systemd:php-fpm):	 Started rocky9-7
    * zabbix-server	(systemd:zabbix-server):	 Started rocky9-7

Daemon Status:
  corosync: active/disabled
  pacemaker: active/disabled
  pcsd: active/enabled
configの内容は下記のとおりです。
[root@rocky9-7 ~]# pcs config showリソース設定の詳細内容は下記のとおりです。Cluster Name: bigbang Corosync Nodes: rocky9-7 rocky9-8 Pacemaker Nodes: rocky9-7 rocky9-8 Resources: Resource: FS_DRBD0 (class=ocf provider=heartbeat type=Filesystem) Attributes: FS_DRBD0-instance_attributes device=/dev/drbd0 directory=/mnt fstype=xfs Operations: monitor: FS_DRBD0-monitor-interval-20s interval=20s timeout=40s start: FS_DRBD0-start-interval-0s interval=0s timeout=60s stop: FS_DRBD0-stop-interval-0s interval=0s timeout=60s Group: zabbix-group Resource: MariaDB (class=systemd type=mariadb) Operations: monitor: MariaDB-monitor-interval-60 interval=60 timeout=100 start: MariaDB-start-interval-0s interval=0s timeout=100 stop: MariaDB-stop-interval-0s interval=0s timeout=100 Resource: VirtualIP (class=ocf provider=heartbeat type=IPaddr2) Attributes: VirtualIP-instance_attributes cidr_netmask=24 ip=1.0.0.126 nic=ens192 Operations: monitor: VirtualIP-monitor-interval-30s interval=30s start: VirtualIP-start-interval-0s interval=0s timeout=20s stop: VirtualIP-stop-interval-0s interval=0s timeout=20s Resource: httpd (class=systemd type=httpd) Operations: monitor: httpd-monitor-interval-60 interval=60 timeout=100 start: httpd-start-interval-0s interval=0s timeout=100 stop: httpd-stop-interval-0s interval=0s timeout=100 Resource: php-fpm (class=systemd type=php-fpm) Operations: monitor: php-fpm-monitor-interval-60 interval=60 timeout=100 start: php-fpm-start-interval-0s interval=0s timeout=100 stop: php-fpm-stop-interval-0s interval=0s timeout=100 Resource: zabbix-server (class=systemd type=zabbix-server) Operations: monitor: zabbix-server-monitor-interval-60 interval=60 timeout=100 start: zabbix-server-start-interval-0s interval=0s timeout=100 stop: zabbix-server-stop-interval-0s interval=0s timeout=100 Clone: DRBD_r0-clone Meta Attributes: DRBD_r0-clone-meta_attributes clone-max=2 clone-node-max=1 master-max=1 master-node-max=1 notify=true promotable=true Resource: DRBD_r0 (class=ocf provider=linbit type=drbd) Attributes: DRBD_r0-instance_attributes drbd_resource=r0 Operations: demote: DRBD_r0-demote-interval-0s interval=0s timeout=90 monitor: DRBD_r0-monitor-interval-20 interval=20 timeout=20 role=Unpromoted monitor: DRBD_r0-monitor-interval-10 interval=10 timeout=20 role=Promoted notify: DRBD_r0-notify-interval-0s interval=0s timeout=90 promote: DRBD_r0-promote-interval-0s interval=0s timeout=90 reload: DRBD_r0-reload-interval-0s interval=0s timeout=30 start: DRBD_r0-start-interval-0s interval=0s timeout=240 stop: DRBD_r0-stop-interval-0s interval=0s timeout=100 Location Constraints: resource 'DRBD_r0-clone' prefers node 'rocky9-7' with score 100 (id: location-DRBD_r0-clone-rocky9-7-100) Colocation Constraints: Promoted resource 'DRBD_r0-clone' with Started resource 'FS_DRBD0' (id: colocation-DRBD_r0-clone-FS_DRBD0-INFINITY) score=INFINITY Promoted resource 'DRBD_r0-clone' with Started resource 'MariaDB' (id: colocation-DRBD_r0-clone-MariaDB-INFINITY) score=INFINITY Promoted resource 'DRBD_r0-clone' with Started resource 'VirtualIP' (id: colocation-DRBD_r0-clone-VirtualIP-INFINITY) score=INFINITY Promoted resource 'DRBD_r0-clone' with Started resource 'httpd' (id: colocation-DRBD_r0-clone-httpd-INFINITY) score=INFINITY Promoted resource 'DRBD_r0-clone' with Started resource 'php-fpm' (id: colocation-DRBD_r0-clone-php-fpm-INFINITY) score=INFINITY Promoted resource 'DRBD_r0-clone' with Started resource 'zabbix-server' (id: colocation-DRBD_r0-clone-zabbix-server-INFINITY) score=INFINITY Order Constraints: promote resource 'DRBD_r0-clone' then start resource 'FS_DRBD0' (id: order-DRBD_r0-clone-FS_DRBD0-mandatory) start resource 'FS_DRBD0' then start resource 'zabbix-group' (id: order-FS_DRBD0-zabbix-group-mandatory) Resources Defaults: Meta Attrs: build-resource-defaults failure-timeout=180s (id: build-resource-defaults-failure-timeout) migration-threshold=3 (id: build-resource-defaults-migration-threshold) resource-stickiness=INFINITY (id: build-resource-stickiness) Cluster Properties: cib-bootstrap-options cluster-infrastructure=corosync cluster-name=bigbang dc-version=2.1.7-5.el9_4-0f7f88312 have-watchdog=false last-lrm-refresh=1724831444 no-quorum-policy=ignore stonith-enabled=false
[root@rocky9-7 ~]# pcs resource configResource: FS_DRBD0 (class=ocf provider=heartbeat type=Filesystem) Attributes: FS_DRBD0-instance_attributes device=/dev/drbd0 directory=/mnt fstype=xfs Operations: monitor: FS_DRBD0-monitor-interval-20s interval=20s timeout=40s start: FS_DRBD0-start-interval-0s interval=0s timeout=60s stop: FS_DRBD0-stop-interval-0s interval=0s timeout=60s Group: zabbix-group Resource: MariaDB (class=systemd type=mariadb) Operations: monitor: MariaDB-monitor-interval-60 interval=60 timeout=100 start: MariaDB-start-interval-0s interval=0s timeout=100 stop: MariaDB-stop-interval-0s interval=0s timeout=100 Resource: VirtualIP (class=ocf provider=heartbeat type=IPaddr2) Attributes: VirtualIP-instance_attributes cidr_netmask=24 ip=1.0.0.126 nic=ens192 Operations: monitor: VirtualIP-monitor-interval-30s interval=30s start: VirtualIP-start-interval-0s interval=0s timeout=20s stop: VirtualIP-stop-interval-0s interval=0s timeout=20s Resource: httpd (class=systemd type=httpd) Operations: monitor: httpd-monitor-interval-60 interval=60 timeout=100 start: httpd-start-interval-0s interval=0s timeout=100 stop: httpd-stop-interval-0s interval=0s timeout=100 Resource: php-fpm (class=systemd type=php-fpm) Operations: monitor: php-fpm-monitor-interval-60 interval=60 timeout=100 start: php-fpm-start-interval-0s interval=0s timeout=100 stop: php-fpm-stop-interval-0s interval=0s timeout=100 Resource: zabbix-server (class=systemd type=zabbix-server) Operations: monitor: zabbix-server-monitor-interval-60 interval=60 timeout=100 start: zabbix-server-start-interval-0s interval=0s timeout=100 stop: zabbix-server-stop-interval-0s interval=0s timeout=100 Clone: DRBD_r0-clone Meta Attributes: DRBD_r0-clone-meta_attributes clone-max=2 clone-node-max=1 master-max=1 master-node-max=1 notify=true promotable=true Resource: DRBD_r0 (class=ocf provider=linbit type=drbd) Attributes: DRBD_r0-instance_attributes drbd_resource=r0 Operations: demote: DRBD_r0-demote-interval-0s interval=0s timeout=90 monitor: DRBD_r0-monitor-interval-20 interval=20 timeout=20 role=Unpromoted monitor: DRBD_r0-monitor-interval-10 interval=10 timeout=20 role=Promoted notify: DRBD_r0-notify-interval-0s interval=0s timeout=90 promote: DRBD_r0-promote-interval-0s interval=0s timeout=90 reload: DRBD_r0-reload-interval-0s interval=0s timeout=30 start: DRBD_r0-start-interval-0s interval=0s timeout=240 stop: DRBD_r0-stop-interval-0s interval=0s timeout=100
クラスタの起動方法
構築したクラスタは自動起動しないようにしています。
ホストを再起動した時等は手動で起動する必要があります。
[root@rocky9-7 ~]# pcs cluster start --all
rocky9-8: Starting Cluster...
rocky9-7: Starting Cluster...
起動していることを確認します。
[root@rocky9-7 ~]# pcs status
Cluster name: bigbang
Cluster Summary:
  * Stack: corosync (Pacemaker is running)
  * Current DC: rocky9-7 (version 2.1.7-5.el9_4-0f7f88312) - partition with quorum
  * Last updated: Fri Aug 30 10:19:42 2024 on rocky9-7
  * Last change:  Fri Aug 30 10:18:34 2024 by root via root on rocky9-7
  * 2 nodes configured
  * 8 resource instances configured

Node List:
  * Online: [ rocky9-7 rocky9-8 ]

Full List of Resources:
  * Clone Set: DRBD_r0-clone [DRBD_r0] (promotable):
    * Promoted: [ rocky9-7 ]
    * Unpromoted: [ rocky9-8 ]
  * FS_DRBD0	(ocf:heartbeat:Filesystem):	 Started rocky9-7
  * Resource Group: zabbix-group:
    * MariaDB	(systemd:mariadb):	 Started rocky9-7
    * VirtualIP	(ocf:heartbeat:IPaddr2):	 Started rocky9-7
    * httpd	(systemd:httpd):	 Started rocky9-7
    * php-fpm	(systemd:php-fpm):	 Started rocky9-7
    * zabbix-server	(systemd:zabbix-server):	 Started rocky9-7

Daemon Status:
  corosync: active/disabled
  pacemaker: active/disabled
  pcsd: active/enabled
クラスタの停止方法
構築したクラスタは自動起動しないようにしています。
ホストを再起動した時等は手動で起動する必要があります。
[root@rocky9-7 ~]# pcs cluster stop --all
rocky9-8: Stopping Cluster (pacemaker)...
rocky9-7: Stopping Cluster (pacemaker)...
rocky9-7: Stopping Cluster (corosync)...
rocky9-8: Stopping Cluster (corosync)...
停止していることを確認します。
[root@rocky9-7 ~]# pcs status
Error: error running crm_mon, is pacemaker running?
  crm_mon: Connection to cluster failed: Connection refused
特定リソースの手動によるフェールオーバー
今回のクラスタ構築はDRDBのMaster側でzabbix-server等が起動するように制約を課しています。
そのため、リソース移動によるフェールオーバーは下記のように実施します。
[root@rocky9-7 ~]# pcs resource move DRBD_r0-clone
Location constraint to move resource 'DRBD_r0-clone' has been created
Waiting for the cluster to apply configuration changes...
Location constraint created to move resource 'DRBD_r0-clone' has been removed
Waiting for the cluster to apply configuration changes...
resource 'DRBD_r0-clone' is promoted on node 'rocky9-8'; unpromoted on node 'rocky9-7'
リソースが全て rocky9-7 から rocky9-8 に移動していることが分かります。
[root@rocky9-7 ~]# pcs status
Cluster name: bigbang
Cluster Summary:
  * Stack: corosync (Pacemaker is running)
  * Current DC: rocky9-8 (version 2.1.7-5.el9_4-0f7f88312) - partition with quorum
  * Last updated: Fri Aug 30 10:53:42 2024 on rocky9-7
  * Last change:  Fri Aug 30 10:53:28 2024 by root via root on rocky9-7
  * 2 nodes configured
  * 8 resource instances configured

Node List:
  * Online: [ rocky9-7 rocky9-8 ]

Full List of Resources:
  * Clone Set: DRBD_r0-clone [DRBD_r0] (promotable):
    * Promoted: [ rocky9-8 ]
    * Unpromoted: [ rocky9-7 ]
  * FS_DRBD0	(ocf:heartbeat:Filesystem):	 Started rocky9-8
  * Resource Group: zabbix-group:
    * MariaDB	(systemd:mariadb):	 Started rocky9-8
    * VirtualIP	(ocf:heartbeat:IPaddr2):	 Started rocky9-8
    * httpd	(systemd:httpd):	 Started rocky9-8
    * php-fpm	(systemd:php-fpm):	 Started rocky9-8
    * zabbix-server	(systemd:zabbix-server):	 Started rocky9-8

Daemon Status:
  corosync: active/disabled
  pacemaker: active/disabled
  pcsd: active/enabled
●UPSを監視する
参考URL:APC社UPSの状態をzabbixで監視する
APC製の中古UPSをZABBIXで監視するように設定します。
apcupsdは既に導入済みという前提とさせていただきます。apcupsdの導入については「APCUPSDの設定方法」を参照してください。
APC製のUPSと接続されているサーバには、apcupsdは既に導入済み(# dnf --enablerepo=repo install apcupsd)という前提とさせていただきます。
apcupsdの導入については「APCUPSDの設定方法」を参照してください。
apcupsdを動作させているサーバ上のZABBIXバージョンはserver、agentとともに7.0.4です。
APC製のUPSと接続されているサーバ上でapcaccessコマンドを実行し、UPSの状態を取得できるか確認します。
# apcaccess
APC : 001,040,1012
DATE : 2017-03-03 13:22:35 +0900
HOSTNAME : hoge.bigbang.mydns.jp
VERSION : 3.14.13 (02 February 2015) redhat
UPSNAME : UPS-1500
CABLE : Ethernet Link
DRIVER : NETWORK UPS Driver
UPSMODE : Stand Alone
STARTTIME: 2017-03-02 21:30:15 +0900
MASTERUPD: 2017-03-03 13:22:35 +0900
MASTER : 192.168.100.1:3551
MODEL : Smart-UPS 1500 DLJ2
STATUS : ONLINE SLAVE
LINEV : 100.8 Volts
LOADPCT : 39.6 Percent
BCHARGE : 100.0 Percent
TIMELEFT : 33.0 Minutes
MBATTCHG : 7 Percent
MINTIMEL : 5 Minutes
MAXTIME : 300 Seconds
OUTPUTV : 100.8 Volts
SENSE : High
LOTRANS : 90.0 Volts
HITRANS : 110.0 Volts
RETPCT : 0.0 Percent
ITEMP : 20.7 C
BATTV : 27.5 Volts
LINEFREQ : 50.0 Hz
LASTXFER : Automatic or explicit self test
NUMXFERS : 0
TONBATT : 0 Seconds
CUMONBATT: 0 Seconds
XOFFBATT : N/A
SELFTEST : NO
STATFLAG : 0x05000408
SERIALNO : AS0502210145
BATTDATE : 2017-02-11
NOMOUTV : 100 Volts
NOMBATTV : 24.0 Volts
FIRMWARE : 601.1DLJ2.A USB FW:
END APC : 2017-03-03 13:22:55 +0900
確認できたらZABBIXで必要な値を検知できるようにzabbix-agentd.confを設定します。検知する値は下記のとおりです。
- LINEV : 入力(商用電源)電圧(V)
- OUTPUTV : 出力電圧(V)
- BATTV : バッテリー電圧(V)
- LOADPCT : 負荷(%)
- BCHARGE : バッテリー残容量(%)
- TIMELEFT : バッテリー稼働時間(分)
- ITEMP : 内部温度(℃)
- CORE0 : CPU0温度(℃) ※lm_sensorsを利用
- CORE1 : CPU1温度(℃) ※lm_sensorsを利用
CentOS 6で動作温度を取得するlm_sensorsをインストールする
lm_sensorsによるCPU温度チェック
@IT:CPUの温度やファンの回転数などをモニタするには
取得するデータを渡すことができるように/etc/zabbix/zabbix_agentd.confでUserParameteを設定します。
ただし、/etc/zabbix/zabbix_agentd.confの設定は、データを取得したい対象サーバ上のzabbix-agentd.confに対し設定する必要がありますので注意してください。
- UserParameter=UPS.LINEV,apcaccess -u|grep LINEV|cut -d ':' -f2|cut -d ' ' -f2
- UserParameter=UPS.OUTPUTV,apcaccess -u|grep OUTPUTV|cut -d ':' -f2|cut -d ' ' -f2
- UserParameter=UPS.BATTV,apcaccess -u|grep ^BATTV|cut -d ':' -f2|cut -d ' ' -f2
- UserParameter=UPS.LOADPCT,apcaccess -u|grep LOADPCT|cut -d ':' -f2|cut -d ' ' -f2
- UserParameter=UPS.BCHARGE,apcaccess -u|grep BCHARGE|cut -d ':' -f2|cut -d ' ' -f2
- UserParameter=UPS.TIMELEFT,apcaccess -u|grep TIMELEFT|cut -d ':' -f2|cut -d ' ' -f2
- UserParameter=UPS.ITEMP,apcaccess -u|grep ITEMP|cut -d ':' -f2|cut -d ' ' -f2
- UserParameter=CPU.CORE0,sensors|grep "Core 0"|cut -d ':' -f2|cut -d ' ' -f8|cut -c2-5
- UserParameter=CPU.CORE1,sensors|grep "Core 1"|cut -d ':' -f2|cut -d ' ' -f8|cut -c2-5
ZABBIXのGUI画面でアイテムを設定します。設定の都合上、テンプレートは新規作成し、その中でアイテム等を定義することとします。
アプリケーション名はUPSとしました。設定するパラメータは下記のとおりです。
| UserParameterで設定したキー名 | 名前 | データ型 | 単位 |
|---|---|---|---|
| UPS.LINEV | UPS Line Voltage | 数値(浮動小数) | V |
| UPS.OUTPUTV | UPS Output Voltage | 数値(浮動小数) | V |
| UPS.BATTV | UPS Battery Voltage | 数値(浮動小数) | V |
| UPS.LOADPCT | UPS Load Percent | 数値(浮動小数) | % |
| UPS.BCHARGE | UPS Battery Capacity | 数値(浮動小数) | % |
| UPS.TIMELEFT | UPS Time Left | 数値(浮動小数) | min |
| UPS.ITEMP | UPS Internal Temperature | 数値(浮動小数) | ℃ |
| CPU.CORE0 | CPU0 Temperature | 数値(浮動小数) | ℃ |
| CPU.CORE1 | CPU1 Temperature | 数値(浮動小数) | ℃ |
アイテム作成後、データが取得できているかどうか確認します(「監視データ」-「最新データ」)。
※アプリケーション名:apcupsd

※アプリケーション名:CPU

グラフ(カスタムグラフ)を作成します。
※グラフ名:UPS Load

※グラフ名:UPS Voltage

※グラフ名:Temperature

あとは必要に応じてトリガーを設定すれば、トリガーにしたがいGUIの画面で監視出来るようになります。例えば、商用電圧があるしきい値を下回った場合(3分間継続して90Vを下回った場合)、トリガーで検知できるようにする場合は下記のような感じです。
{Template Apcupsd:UPS.LINEV.last(#3)}<90
さらに、アクションを指定することによりメールの送信等が出来るようになります。
UPSが接続されているサーバにzabbix-agentがインストールされていない場合の対処
UPSが接続されているサーバにzabbix-agentがインストールされている場合、上記と同様にUserParameterを設定します。zabbix-agentd.confでzabbix-serverのIPアドレスを指定することによりデータを収集することが出来ます。データ収集出来ない場合、該当テンプレートでデータ収集したいサーバをリンクさせてください。
しかし、UPSが接続されているサーバにzabbix-agentがインストールされていない場合、zabbix-agentがインストールされているサーバでapcaccessの結果を取得できるようにする必要があります。
そこで、定期的に結果を取得できるようシェルスクリプトを作成します。
#!/bin/bash

APC=`which apcaccess`

if [ -e $APC ]; then
  echo '`which apcaccess`' > script.sh
  ssh root@$1 'bash -s' < script.sh > /tmp/apcaccess_$1.txt
  rm -f script.sh
else
  exit
fi
apcaccess.sh hogeと実行すると、結果が/tmp/apcaccess_hoge.txtに出力されます。
あとはテキストファイルから必要なデータを抜き出せば監視出来るようになります。
30秒毎にcronを動作させる
30秒毎にcronを実行させるには、seqコマンドで待機(sleep)する秒数を指定して、その分をsleepさせてからスクリプトを実行しするようにさせます。
; 10秒おきに実行
* * * * * for i in `seq 0 10 59`;do (sleep ${i} ; /path/to/script prm1 prm2) & done;
; 15秒おきに実行
* * * * * for i in `seq 0 15 59`;do (sleep ${i} ; /path/to/script prm1 prm2) & done;
; 毎分15秒と45秒に実行
* * * * * for i in 15 45;do (sleep ${i} ; /path/to/script prm1 prm2) & done;
* * * * * for i in `seq 0 10 59`;do (sleep ${i} ; /path/to/script prm1 prm2) & done;
; 15秒おきに実行
* * * * * for i in `seq 0 15 59`;do (sleep ${i} ; /path/to/script prm1 prm2) & done;
; 毎分15秒と45秒に実行
* * * * * for i in 15 45;do (sleep ${i} ; /path/to/script prm1 prm2) & done;
●HDDの温度監視
参考URL:ZabbixでHDDの温度を監視する
参考URL:Zabbix Agentの「リモートコマンド」を使って監視対象のOSコマンドを実行する
Zabbix 7.0でHDDの温度監視が出来るように設定します。
# dnf --enablerepo=epel install hddtemp -y温度は下記コマンドで確認できます。
# hddtemp
/dev/sda: WDC WD20EFAX-68FB5N0: 37°C
/dev/sdb: WDC WD20EFAX-68FB5N0: 34°C
温度の値のみを表示させるには下記のようにします。
# hddtemp -n /dev/sd[a,b]
37
34
Zabbix Agent 7.0より前のバージョンは下記のように設定します。
# vi /etc/zabbix/zabbix_agentd.conf
EnableRemoteCommands=1
zabbixにroot権限を与えます。
# vi /etc/zabbix/zabbix_agentd.conf
# AllowRoot=0
 ↓ 下記のように変更
AllowRoot=1

# systemctl restart zabbix-agent

または

# visudo
# allows 'zabbix' user to run all commands without password.
zabbix ALL=NOPASSWD: ALL

# systemctl restart zabbix-agent
Zabbix Agent 5.0以降のバージョンでは下記のように設定します。
コマンドの実行を許可させるため、/etc/zabbix/zabbix_agentd.confを編集します。
Zabbix 5.0では、EnableRemoteCommands=1は非推奨になり、AllowKeyを利用します。
# vi /etc/zabbix/zabbix_agentd.conf
 ↓ 末尾に追加
AllowKey=system.run[/bin/hddtemp /dev/sda -n]
AllowKey=system.run[/bin/hddtemp /dev/sdb -n]

# systemctl restart zabbix-agent
Zabbixエージェントでコマンドを実行し、値を取得できるか確認します。
# zabbix_agentd -t "system.run[/bin/hddtemp /dev/sda -n]"
system.run[/bin/hddtemp /dev/sda -n]          [t|42]
問題なく"42"という値が取れています。"t"というのはテキスト形式のことを表しますが、今のZabbixではアイテムでデータ型を数値などにしても問題なく数値として取り込んでくれるようです。
テンプレート及びアイテムを作成します。
##### テンプレートの作成
[設定]ー[テンプレート]ー[テンプレートの作成]を押下
テンプレート名:Template HDD Temperature(任意)
グループ名:Template(任意)
[追加]を押下。

##### アイテムの作成
[設定]ー[テンプレート]ー名前の欄に[HDD]と入力後、適用を押下)ー[Template HDD Temperature]をクリック。
[アイテム]ー[アイテムの作成]を押下。
名前:/dev/sda temperature(任意)
タイプ:Zabbixエージェント
キー:system.run[/bin/hddtemp /dev/sda -n]
データ型:数値 (浮動小数)
単位:℃
更新間隔:1m
アプリケーションの作成:HDD temperature(任意)
[更新]を押下。
監視するHDDの数だけ、作業を繰り返します。
グラフを作成します。
[設定]ー[テンプレート]ー名前の欄に[HDD]と入力後、適用を押下)ー[Template HDD Temperature]をクリック。
[グラフ]ー[グラフの作成]を押下。
名前:HDD Temperature(任意)
幅:(任意)
高さ:(任意)
アイテムの[追加]をクリック。
表示された一覧から、該当のアイテムを選択。
監視対象アイテムを複数選択すると、一つのグラフに複数のデータが表示されます。
[追加]を押下。
HDD温度を監視するサーバ(ホスト)に作成したテンプレートを関連付けます。
[設定]ー[ホスト]ー[監視対象ホスト]を選択。
[テンプレート]を選択。
新規テンプレートをリンク:「Template HDD Temperature」と入力後、[選択]を押下。
「Template HDD Temperature」が表示されない場合、ホストグループで「Template」を入力し、[選択]を押下。
「Template HDD Temperature」にチェックを入れ、[選択]を押下。
[更新]を押下。
作成されたグラフを確認します。
[設定]ー[ホスト]ー[監視対象ホスト]を選択。
[グラフ]をクリック。
「Template HDD Temperature: HDD Temperature」を選択。
[プレビュー]をクリック。
グラフが表示されます。
●/var/log/messagesを監視する方法
参考URL:Zabbixでログ監視
/var/log/messagesに記録されるあるキーワードを検知できるように設定します。その他任意ログ監視に応用できます。
/var/log/messagesは通常root権限でしか読み込めません。ここではZabbixがroot権限で実行できるように/etc/zabbix/zabbix_agentd.confを下記のように変更します。
# vi /etc/zabbix/zabbix_agentd.conf

# AllowRoot=0
 ↓
AllowRoot=1 ← 変更

# systemctl restart zabbix-agent
再起動後、/var/log/zabbix/zabbix_agentd.log に started [active checks #1]と記録されていれば問題ありません。
上記に記載した設定方法はセキュリティ上問題となることから実施しないこと。
/var/log/messagesを監視するには権限を与える必要があります。
# chgrp zabbix /var/log/messagesログローテーション時に権限が元に戻ってしまうため/etc/logrotate.d/rsyslogを変更します。
# vi /etc/logrotate.d/rsyslog
/var/log/cron
/var/log/maillog
/var/log/messages
/var/log/secure
/var/log/slapd.log
/var/log/spooler
{
    missingok
    sharedscripts
    postrotate
        /usr/bin/systemctl kill -s HUP rsyslog.service >/dev/null 2>&1 || true
    endscript
    create 0640 root zabbix ← 追加
}
Zabbix監視画面(GUI)にログインし、テンプレート、アイテム、トリガー、アクションの順に設定します。
テンプレートは既存のテンプレートに追加する形でアイテム等を作成しても構いません。ここではテンプレートの管理上、新規に作成することとします。
「設定」ー「テンプレート」ー「テンプレートの作成」で新規テンプレートを作成します。
テンプレート名:Template Log Monitor
グループ 所属グループ:Template
ホスト/テンプレート 利用中:監視対象のサーバ名
作成したテンプレート(「設定」ー「テンプレート」ー「Template Log Monitor」を選択)の上部にある「アイテム」をクリック、その後、右上にある「アイテムの作成」をクリックします。
名前:syslog
タイプ:Zabbixエージェント(アクティブ)
キー:log[/var/log/messages]
データ型:ログ
更新間隔(秒):30
ヒストリ保存期間(日):90
ログの時間の形式:未入力
アプリケーションの作成:Syslog
説明:未入力
有効:チェックを入れる
設定が完了したら「追加」をクリックします。設定に問題が無ければステータスが有効になります。作成したアイテムが問題なく動作しているか確認します。
「監視データ」ー「最新データ」でアプリケーション欄に「Syslog」を記載し選択します。この時、「ヒストリがないアイテムを表示」にチェックを入れておいてください。問題なく監視できていれば「最新のチェック時刻」等に情報を表示されます。
情報が表示されない場合、zabbix_agentd.conf内のホスト名が間違っていないか、Firewall機能で10050番ポート(Zabbixサーバ側)、10051番ポートが塞がれていないかどうか確認してください。
・エージェント側の設定ファイルでServerが正しく設定されている
・エージェント側でアクティブチェックが有効になっている
(設定ファイル内のDisableActiveがコメントアウトされているか0に設定)
・エージェント側からサーバ側にポート番号10051で接続可能
(Firewall等で制限していないか?)
・エージェント側の対象となるログファイルがzabbixアカウントで読み取り可能
・アイテムの設定でタイプがZABBIXエージェントのアクティブになっている
確認方法は下記のとおりです。
$ telnet (Zabbixサーバが動作しているマシン) 10050

$ telnet (Zabbixエージェントが動作しているサーバ) 10051

※例(Zabbixサーバの場合)
$ telnet localhost 10050
Trying 192.168.0.1...
Connected to Aserver.
Escape character is '^]'.
(ポートがオープンしている場合、自動的に切断されます。)
Connection closed by foreign host.

※例(Zabbixエージェントの場合)
$ telnet localhost 10051
Trying 192.168.0.1...
Connected to Aserver.
Escape character is '^]'.
(リターンキーを押下すると切断されます。)
Connection closed by foreign host.

※接続不可時の応答例
telnet: Unable to connect to remote host: Connection refused
作成したテンプレート(「設定」ー「テンプレート」ー「Template Log Monitor」を選択)の上部にある「トリガー」をクリック、その後、右上にある「トリガーの作成」をクリックします。
名前:[Syslog] RSYNC : rsync error
条件式:{Template Log Monitor:log[/var/log/messages].iregexp("rsync error")}<>0
上記のように設定するには、条件式の空欄横の「追加」をクリック。
アイテム:右上の「グループ」「ホスト」で適用したいサーバを選択し、「syslog」をクリック。
関数:「最新(T秒前/T個前)の値が正規表現Vに一致する場合N=1、
その他の場合N=0(#条件、大文字小文字を区別しない)」を選択。
V:rsync error(上記の場合、大文字小文字を区別なしに検知可能となります。)
最新の(T):未入力
N:0(デフォルトのまま)
障害イベントを継続して生成:チェックを入れない
説明:未入力
URL:未入力
深刻度:「軽度の障害」を選択
有効:チェックを入れる
「更新」をクリックします。
このまま暫くして/var/log/messagesに「rsync error」を含んだ一文が記録されるとZabbixで検知するようになります。
「監視データ」-「最新データ」でアクティブチェックの情報が表示または更新されない場合、「●Active Checkが機能しない場合の対処方法」を確認してください。
または、下記のようにloggerコマンドを実行して/var/log/messagesに書き出すことにより試験することも可能です。
$ logger -p user.warn -t [TEST] "(Error)rsync error"必要に応じて、アクションを設定します。アクションの設定で「リカバリメッセージ」をチェックしてしまうと、トリガーで設定した「rsync error」文字列を検知し通知した後、問題のないログが記録されるとリカバリメッセージが通知されてしまいます。この場合のリカバリメッセージは不要ですので「リカバリメッセージ」をチェックする必要はありません。
「障害イベントを継続して生成」に「チェックを入れない」としたことには理由があります。
例えば、監視対象ログが/var/log/messagesで、ある文字列を監視し、それを検知した場合、メールを送信すると言うアクションが設定されているとします。
/var/log/messagesは何かしらの不具合により監視対象となっている文字列等が大量に記録されることがあります。
「障害イベントを継続して生成」に「チェックを入れる」設定となっている場合、アイテムの「更新間隔」の設定内容にもよりますが、大量のメールが送信される可能性があるためです。
●SNMPトラップの監視設定(SNMPTT)
Net-SNMPの設定が完了しているものとします
SNMPトラップを受信してZabbixで監視をするための設定方法です。Zabbix公式マニュアルで推奨しているSNMPTT(snmptthandler-embedded)を使って設定します。
参考URL:Zabbix 7.0にSNMP Trapを監視する手順 (AlmaLinux 9+SNMPTT)
参考URL:CentOS8系でperl-Net-SNMPをインストールする
参考URL:Zabbix 2.4 SNMPトラップの監視設定メモ(SNMPTT)
参考URL:SNMPTRAPの発報方法(v1~v3)
参考URL:SNMP Trapの受信について
参考URL:SNMPTTを利用してSNMPトラップを監視する その1
参考URL:SNMPTTを利用してSNMPトラップを監視する その2
Zabbixでトラップを受信するには、下記のような手順となります。
監視対象機器からトラップを送信する。
↓
snmptrapdでトラップ受信し、snmpttに渡す。
↓
snmpttはトラップを整形し、SNMPTrapperFile(テキストファイル)に出力する。
↓
snmpttが出力したファイルを、Zabbixが読み込む。
firewalldでの除外設定
SNMPトラップはUDP162番ポートを使用します。iptablesやfirewalldなどでパケットフィルタリングを実施している場合は、ポートを開けます。
# firewall-cmd --add-service=snmptrap --permanent
# firewall-cmd --reload
# firewall-cmd --list-service
http https snmp snmptrap ssh
snmptrapが表示されれば、該当ポートが開放されています。
リポジトリを登録
SNMPTTは通常のRocky Linuxのリポジトリには存在しませんので、EPELとCRBのリポジトリを登録します。
なお、CRB (CodeReady Builder)のリポジトリは、以前はPowerToolsという名称で呼ばれていたものとなります。
# dnf install epel-release -y
# dnf config-manager --set-enabled crb
パッケージのインストール
以下のコマンドで、NET-SNMPと各種関連Perlモジュールをインストールします。
※Rocky Linux 9の場合
dnf install net-snmp net-snmp-utils net-snmp-perl perl-Time-HiRes \
perl-Text-Balanced perl-Sys-Syslog perl-DBI perl-DBD-MySQL perl-DBD-Pg \
perl-threads perl-Digest-MD5 perl-DBD-ODBC perl-Config-IniFiles perl-Net-IP -y
SNMPTTのダウンロード
SNMPTTを以下の公式サイトからダウンロードします。
今回はsnmptt_1.5.tgzをダウンロードしました。
http://www.snmptt.org/downloads.shtml
SNMPTTのインストール
先ほどダウンロードしたSNMPTTのファイルをサーバーの任意のディレクトリに配置し、展開します。
# tar zxvf snmptt_1.5.tgz展開したファイルに含まれるSNMPTTとSNMPTT handlerの実行ファイルを/usr/sbin/に配置します。
# cd snmptt_1.5
# cp snmptt /usr/sbin/
# chmod +x /usr/sbin/snmptt
# cp snmptthandler /usr/sbin/
# chmod +x /usr/sbin/snmptthandler
SNMPTT実行用ユーザーsnmpttを-rオプションを付けてシステムユーザーとして作成します。
# adduser -r snmptt設定ファイルを/etc/snmpttに配置します。
# mkdir /etc/snmptt
# chown -R snmptt.snmptt /etc/snmptt
# chmod 750 /etc/snmptt
# cp snmptt.ini /etc/snmptt/
ログ等を保管するディレクトリを作成します。
# mkdir /var/log/snmptt
# chown -R snmptt.snmptt /var/log/snmptt
# chmod -R 755 /var/log/snmptt
# mkdir /var/spool/snmptt/
# chown -R snmptt.snmptt /var/spool/snmptt
# chmod -R 750 /var/spool/snmptt
systemdに起動用設定ファイルを配置します。
# cp snmptt.service /usr/lib/systemd/system/snmptt.service
# chmod -x /usr/lib/systemd/system/snmptt.service
ログローテート用の設定ファイルを配置します。
# cp snmptt.logrotate /etc/logrotate.d/snmpttログローテートの設定ファイルの記載が一部適切ではないので、緑字部分を修正します。
# vi /etc/logrotate.d/snmptt

/var/log/snmptt/snmptt*.log /var/log/snmptt/snmptthandler.debug {
    weekly
    notifempty
    missingok
}

/var/log/snmptt/snmptt.debug {
    weekly
    notifempty
    missingok
    postrotate
        /usr/bin/systemctl reload snmptt >/dev/null 2>/dev/null ← reloadコマンドを修正
    endscript
}
SNMPTTの設定
SNMPTTの設定ファイルsnmptt.iniを下記のように修正します。
# vi /etc/snmptt/snmptt.ini
net_snmp_perl_enable = 1
log_enable = 1
log_file = /var/log/snmptt/snmptt.log
date_time_format = %Y/%m/%d %H:%M:%S
syslog_enable = 0
Trap受信時の出力内容を定義するsnmptt.confファイルを作成します。
# cat << 'EOF' > /etc/snmptt/snmptt.conf
EVENT general .* "General event" Normal
FORMAT ZBXTRAP $aA $*
EOF
SNMPTTを起動させます。
# systemctl start snmptt
# systemctl enable snmptt
# systemctl status snmptt
snmptrapdの設定
snmptrapdの設定を行います。
# vi /etc/sysconfig/snmptrapd
OPTIONS="-On -Lsd -p /var/run/snmptrapd.pid -M /usr/share/snmp/mibs:/usr/share/snmp/venders -m all"

# vi /etc/snmp/snmptrapd.conf
authCommunity   log,execute,net public
traphandle default /usr/sbin/snmptthandler
snmptrapdを起動させます。
# systemctl start snmptrapd
# systemctl enable snmptrapd
# systemctl status snmptrapd
SNMP Trapの受信テスト
一度ここでsnmptrapコマンドを用いて、SNMP Trapを送信しログに記録されるか確認します。
# snmptrap -v2c -c public 127.0.0.1 "" .1.3.6.1.6.3.1.1.5.1 coldStart s "Start"SNMP Trap送信後、SNMPTTのログにTrapの内容が出力されていれば問題ありません。
# cat /var/log/snmptt/snmptt.log
2024/10/25 15:59:23 .1.3.6.1.6.3.1.1.5.1 Normal "General event" localhost - ZBXTRAP 127.0.0.1 Start
Zabbixサーバーの設定
Zabbixサーバーは、下記の設定を変更します。
# vi /etc/zabbix/zabbix_server.conf
SNMPTrapperFile=/var/log/snmptt/snmptt.log
StartSNMPTrapper=1
変更を反映するため、Zabbixサーバーを再起動します。
systemctl restart zabbix-server